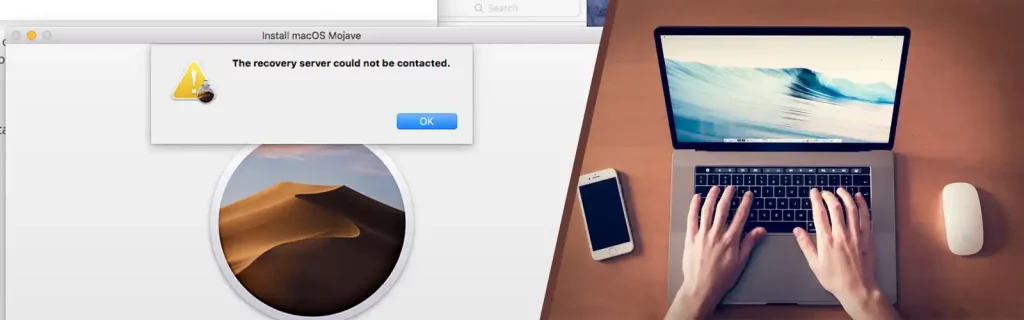
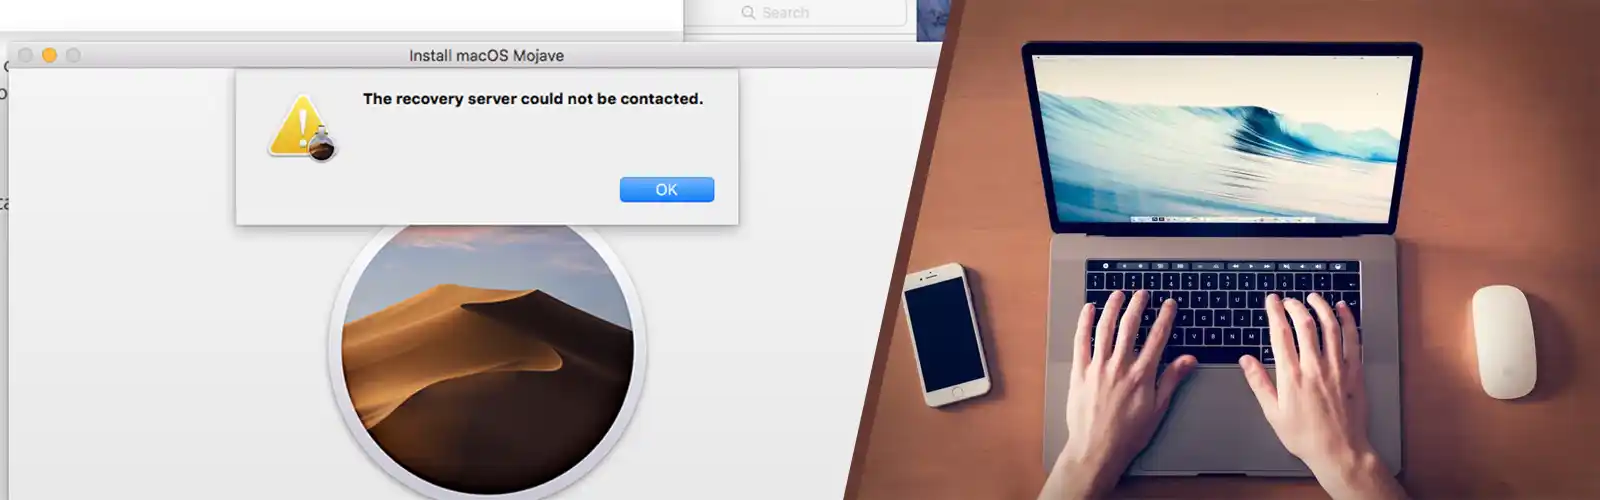
Reasons For The The Recovery Server Could Not Be Contacted
One major reason for The Recovery Server Could Not Be Contacted error is the wrong synchronization of time and date on your computer.
Some other reasons for The Recovery Server Could Not Be Contacted error are
Your macOS is disconnected from the wi-fi network.
The mac server could not be responding due to too many users trying to install the latest macOS update released by the company.
Fixing The Recovery Server Could Not Be Contacted Error
Sync The Date And Time Settings On Your Computer To That On The Apple Recovery Server –
It is important that the date and time set on your computer matches to the ones on the Apple recovery server. Therefore, if The Recovery Server Could Not Be Contacted crops up on your screen, make sure to sync these details.
- Start off by closing the window showing this error. Once the window is closed, the macOS utility windows will open.
- On the top menu bar, you will see several options like, ‘File’, ‘Edit’, ‘Utilities’. Select ‘Utilities’ and move to the next step.
- A list of options will pop up. These options are ‘Firmware Password Utility’, ‘Network Utility’ and ‘Terminal’. Double-click the ‘Terminal’ option.
- Next, you will have to type in a command. The command is ‘ntpdate -u time.apple.com’. Once done, press ‘Enter’.
- If you get a ‘operation not permitted’ warning on your screen, try putting ‘sudo’ in front of the command. The command will be ‘sudontpdate -u time.apple.com’.
- The process sometimes takes a while to finish. Once it is complete, you can try reinstalling the macOS update all over again.
Also check what to do when MacBook camera is not working
Check If The Computer Is In fact Connected To An Active Wi-fi Network
Make sure that the router is not placed far from the computer and that there are not too many gadgets in between. Water and electric appliances tend to distort the wi-fi signal. Therefore, avoid keeping the router closer to Refrigerators, television sets, fish tanks etc.
Also check the power cable on the router and that the power button on the router is working fine. If the LED above the power button lights green in color, the internet is working fine.
Hence checking the Wi-fi connection can help you fix the error. To verify the network status on your computer you can carry out these steps –
- Click the ‘Apple Menu’ and go to ‘system preferences’ therefrom.
- Once you reach the ‘System preferences’ window, select the ‘Network’. Under the ‘Ethernet’ head, you will see the name of your network. Click on the network name.
- You can see the status of the network. If the wi-fi network is connected to the computer, you will see the ‘Connected’ sign right next to the network name.
Placing the router closer by and checking if all the cables are intact will help you learn more about the error. Which ultimately will ease the process of fixing the issue.
If the network icon at the top of your screen has greyed out, we advise you to try reconnecting the wi-fi network to the computer. Disconnect the network and shut down the computer for some time, after restarting the computer, connect the wi-fi network to the computer again.
Busy Server Can Cause Issue While Connecting To Recovery Server
If the Apple server is busy, the error is likely to stay for some time. At least till the company fixes the issue or till the load on their web server comes down a bit.
Too many users could be trying to update the new version. This would result in the webserver acting up. Therefore, you should wait out the crowd.
Erasing The Disk And Reinstalling macOS To fix Connection Issue With Recovery Service
If none of the above options work, you can try clearing the disk. You can use the recovery mode to clear out the disk. Once you erase the disk completely off everything, you can re-install the macOS.
Follow these steps –
- Shut down your computer for some time. Restart it after few minutes. And since you are about to clear all the data off the Mac makes sure to keep a backup of the necessary data.
- When the macOS starts press and hold the CDM + R keys. This will initiate the recovery mode.
- Once in the recovery mode, select the ‘Disk utility’ option and erase the Macintosh HD volume. This process will remove all the data stored on your macOS.
- Once this process finishes up, you can reinstall the macOS. And The Recovery Server Could Not Be Contacted error won’t show up this time.
These effective methods will help you fix The Recovery Server Could Not Be Contacted error. The process is less time-taking and it also does not demand too much of tech knowledge.
If you do need any tech assistance relating to the subject, you can reach out to us at any hour of the day. The helpdesk team is always available at your service. Also you can check the best way to fix MacBook plugged in not charging